Finding Files or Folders and Saving the Result
As a PC’s hard disk fills up, it can become harder to find the files and folders you need. But Windows provides several ways to find files and folders. There isn’t one best way to search—you can use different methods for different situations. Following are the different methods if you are using Windows Vista or Windows 7. Please find the information required for Windows XP at the bottom.
Use the search box on the Start menu
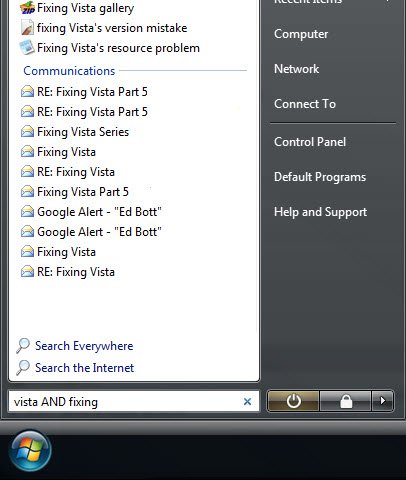
Start Menu Search Box
You can use the search box on the Start menu to find files, folders, programs, and email messages stored on your computer.
- To find an item using the Start menu:
- Click the Start button, and then type a word or part of a word in the search box.
As you type, items that match your text will appear on the Start menu. The search results are based on text in the file name, text in the file, tags, and other file properties.
Use the search box in a folder or library
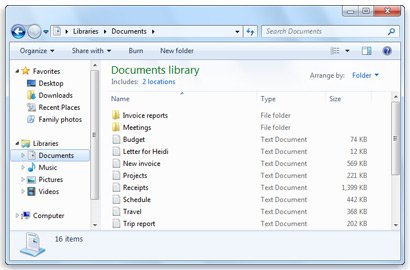
Search Box in Folder or Library
You’re often likely to be looking for a file that you know is in a particular folder or library, such as Documents or Pictures. Browsing for the file might mean looking through hundreds of files and subfolders. To save time and effort, use the search box at the top of the open window. The search box filters the current view based on text that you type. The search looks for text in the file name and contents; and in the file properties, such as in tags. In a library, the search includes all folders included in the library as well as subfolders within those folders.
- To search for a file or folder by using the search box:
- Type a word or part of a word in the search box.
As you type, the contents of the folder or library are filtered to reflect each successive character you type. When you see the file that you want, stop typing.
Expand a search beyond a specific library or folder
If you can’t find what you’re looking for in a specific library or folder, you can expand the search to include different locations.
- Type a word in the search box.
- Scroll to the bottom of the list of search results. Under Search again in, do one of the following:
- Click Libraries to search across every library.
- Click Computer to search across your entire computer. This is the way to search for files that aren’t indexed (such as system or program files). However, be aware that the search will be slower.
- Click Custom to search specific locations.
- Click Internet to search online, using your default web browser and your default search provider.
To Search for Files and Folders in Windows XP
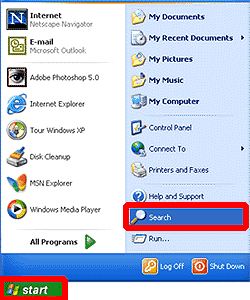
Windows XP Search
1. Click Start, and then click Search. 2. Click All files and folders.
Important
If you do not see All files and folders, you have probably changed your default search behavior.
1. Click Change preferences.
2. Click Change files and folders search behavior.
3. Click Standard, and then click OK.
4. Click All files and folders.
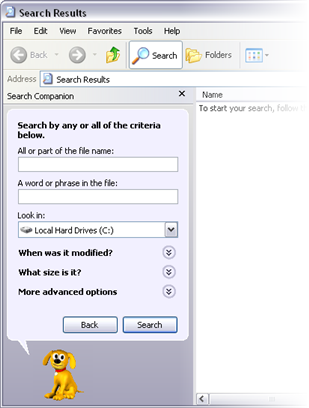 3. Type part or all of the name of the file or folder, or type a word or phrase that is in the file. 4. If you do not know either piece of information or want to narrow your search further, select one or more of the remaining options:
• In Look in, click the drive, folder, or network you want to search.
• Click When was it modified? to look for files that were created or modified on or between specific dates.
• Click What size is it? to look for files of a specific size.
• Click More advanced options to specify additional search criteria.
5. Click Search.
Starting a program by command line operation

Command Line
In Microsoft Windows 95/98 and later, you can start a Windows-based or MS-DOS-based program from the command prompt in an MS-DOS window. To do so, type the program’s executable filename, or use the START command at the MS-DOS command prompt. For example, to start ScanDisk for Windows, type “scandskw” (without quotation marks) or “start scandskw” (without quotation marks) at the MS- DOS command prompt. NOTE: You may use Start.exe to activate a shortcut as well as a program. For example, this may be useful when running an MS-DOS-based program from within a batch file that has specific requirements configurable in the shortcut’s properties. More Information:If you type only the program’s executable filename, Windows searches the current folder, and then the folders on the path statement for the executable file. If the file is not found, you receive the following error message:
bad command or filename
If you use the START command, Windows searches the current folder, the folders on the path statement, and the registry. If the file is not found, you receive the following error message: Cannot find file ” (or one of its components). Check to ensure the path and filename are correct and that all required libraries are available. The START command is used at an MS-DOS prompt to start an MS-DOS-based or Windows-based program. The program is started as a separate task that can be run in the foreground or background. You can use the START command if you want to keep your current MS-DOS settings, while you run another MS- DOS-based program in the background. You can use the START command to open files if its extension is a registered file type in Windows. For Example, if you type “start Readme.txt,” Notepad is started and the Readme.txt file is displayed. More information about the START command, type the following command at the MS-DOS prompt:
Source: Microsoft Support
Changing window settings
Viewing a Thumbnail of an Open Window

Thumbnail view of opened windows applications
Move your mouse over the icon of any open window in the Taskbar to view a thumbnail version of that open window. (Click on the thumbnail of that open window to view the full size version of the open window, bring that open window to the front of your Desktop, and make it the active window.)
Displaying the Desktop Through Open Windows
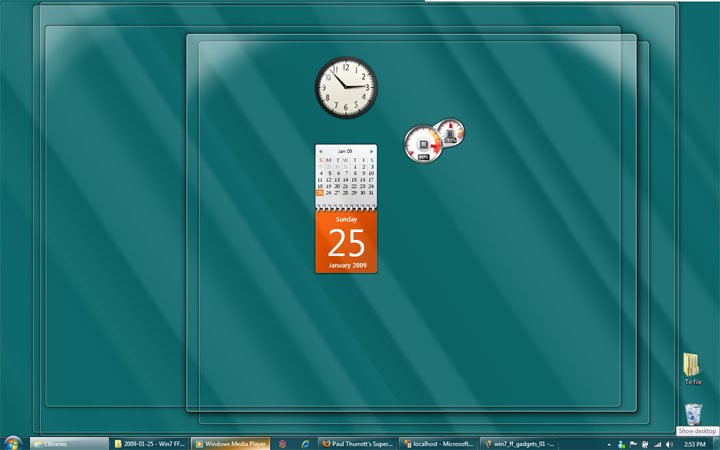 Display the desktop through all your open windows by moving your mouse over the Show Desktop button, which is located at the lower right-hand corner of the screen (there will be outlines of all the open windows). Remove your mouse from the Show Desktop button to bring the windows back to full view. You will see the Desktop through outlines of all the open windows. (To display the Desktop without the outlines of your open windows being displayed, click on the Show Desktop button.)
Selecting an Open Window from Thumbnails of Open Windows
Press and hold down the Alt key while you press the Tab key to move between thumbnails all open windows (programs, documents, Windows Explorer, Windows Desktop). A thumbnail will be selected each time you press the Tab key; release the Tab key when the desired thumbnail is selected.
Arranging Two Windows Side by Side
Use the Aero Snap feature to arrange two open windows (i.e., two Web pages) side by side. Doing this can be helpful if you need to compare two documents. To arrange the windows side by side, drag the title bar of any open window to the left or right side of the screen, and then release the mouse when you see an outline of the window appear. Repeat for the second open window.
Maximize One Open Window and Minimize All Other Open Windows
Display (maximize) a single open window on your Desktop while minimizing all your other open windows by using the Aero Shake feature. To use Aero Shake, click on the title bar of the window, and then, while holding down the mouse, quickly move (shake) your mouse back and forth until all your other open windows on the Desktop disappear (they’ll still be open, but will be minimized).
Viewing 3D Versions of Open Windows
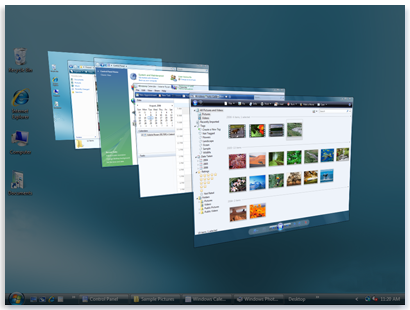
3D view of Opened Windows
You can view 3D versions of all your open windows by pressing and then holding down the Windows logo key while pressing the Tab key. Continue to hold down the Windows logo key while you press the Tab key to cycle through each open window until the open window you want to select is at the front.
Adding/Removing programs
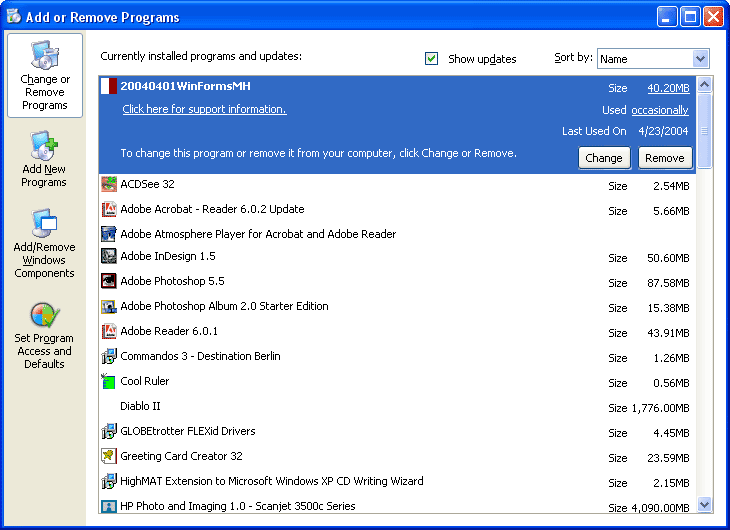 When executed from the Add/Remove Programs applet found in the Control Panel, the install program for a Windows 95 application will store instructions for removing that application from the system. Windows 95 shows a list of the programs that can be removed by Windows 95 in the Install/Uninstall box of the Add/Remove Programs applet of Control Panel. If you choose to remove the application, then will be deleted from your hard disk and its name will be deleted from the program list. However, if you have deleted a program manually by deleting the files and/or directory from your hard drive without going through the Add/Remove applet, then Windows 95 can no longer delete those programs automatically and these programs will remain in the list. The programs can be deleted from the list by directly editing the Registry. Editing the Registry should be done only by experienced users and with extreme care and the Registry should always be exported or backed up before any changes are made.
Clearing the contents of document menu
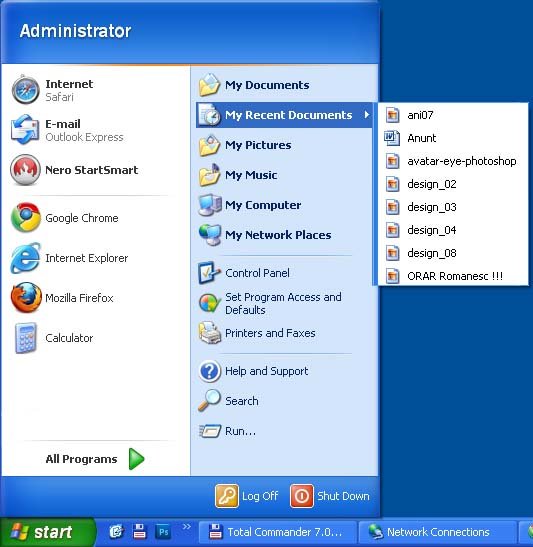
Recent Documents Windows XP
The My Recent Documents folder on the Windows XP, Recent Items in Windows Vista on Start menu and and Recent Listin Windows 7 on taskbar context menu displays a list of files and documents that you most recently used. Windows remembers the files you’ve recently used and you can get quick access to them through the Recent Documents list. However, sometimes you may wish to clear the menu. Following is the procedure to clear the recent documents list:
- Right-click Start, and then click Properties. Or, if the Start menu is already displayed, right-click an empty area of the Start menu, and then click Properties.
- Click Customize.
- Click the Advanced tab.
- Under Recent documents, click to select the List my most recently opened documents check box, click OK, and then click OK. The next time you click Start, the My Recent Documents command is displayed on the Start menu.
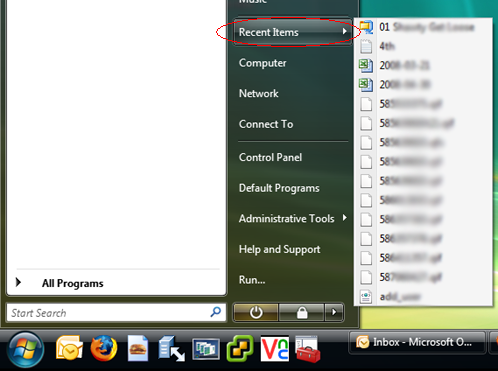
Recent Items in Windows Vista and Windows 7
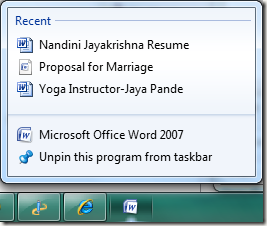
Jump List in Windows 7
Microsoft has introduced so called jumplists in Windows 7. These jumplists are part of the Windows 7 taskbar and appear when the user right-clicks an item in the taskbar. They usually display the most recent items that have been opened and can also contain shortcut links to program functions. One example of this would be a jumplist for an email program that contains links to tasks such as writing emails or checking for new mails.
To Clear Recent Items in Windows 7
1. Go to Start menu, and type gpedit.msc in the search line and press Enter. 2. If prompted by UAC, click on Continue. 3. Now go to this folder : User ConfigurationAdministrative TemplatesStart Menu and Taskbar. 4. once you got to this folder, you will find ‘Clear history of recently opened documents on exit’ in the right pane, just double click on it.
Customizing The Taskbar
The Taskbar is the strip across the length of the screen that is the central means for accessing programs and files. In addition to containing the Start button, the taskbar can be used as the main pathway to accessing frequently used functions, programs, or files. Unlike icons on the desktop, it is not hidden by open windows. The taskbar has several sections as shown in the figure below. The term “taskbar” is not used consistently in articles and books on Windows XP. Here it will mean the entire strip. The middle part where the open programs are listed is also called the “taskbar” by many people. In addition to the sections shown in the figure, assorted tool bars can be added. The various areas of the taskbar are discussed in the sections below.

Taskbar Windows XP
Configuring the taskbar
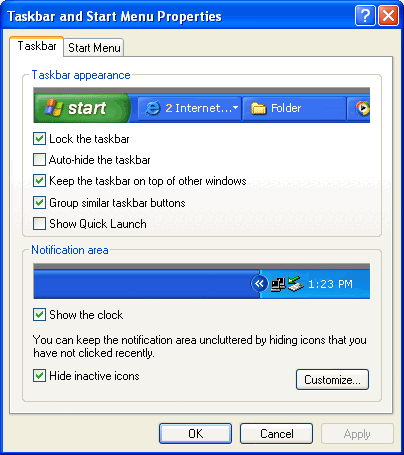 To configure the taskbar, right-click in an empty space on the bar and select “Properties” from the context menu. The resulting dialog box is shown in the figure below. The taskbar is locked by default and the box by the entry “Lock the taskbar” will have to be unchecked if you wish to make changes. Each area of the taskbar has a vertical divider separating it from the other areas. The dividers are draggable and can be used to resize individual areas.
Notification Area (System Tray)
A variety of programs will place icons in the section of the taskbar on the far right that typically contains the clock. In XP, Microsoft calls this the “Notification area”. It was previously known as the “System tray”. Programs with icons in this area have one or more functions running in the background. If Windows XP deems an icon to be inactive, it will hide it unless the setting is changed. The setting is in the bottom section of the properties dialog box as is shown in the figure below. You can also show or hide the clock in this section. If you choose to check “Hide inactive icons”, the customize button (grayed out above) is available and individual icons can have their settings customized as shown in the next figure.
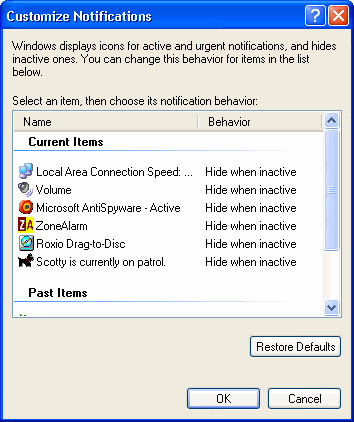
Customize Notification
The functions associated with icons in the notification area can usually be seen by right-clicking (Left-clicking often, but not always, has no effect.)
Quick Launch Bar
Depending on the configuration of your computer, the quick launch bar may not already be available. The taskbar properties dialog box contains an entry for showing the “Quick Launch” bar. This area of the taskbar will appear just to the right of the Start button as shown in the figure below.
Quick Launch Bar
As the name indicates, this area provides for quick access to programs, folders, or files. Shortcuts can be dragged and dropped here. Unwanted entries can be removed by using the right-click context menu. Only a single left-click is required to open programs or files from here. By default, an icon for “Show Desktop” is included. This useful applet minimizes all open windows and displays the desktop on the screen. Other default entries are the Microsoft applications Internet Explorer and Windows Media Player. The example above contains an icon for Internet Explorer, Show Desktop, and Notepad. The quick launch bar is a convenient place for shortcuts to frequently used applications or folders.
Toolbars
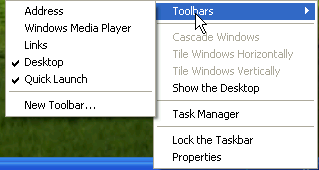 It is possible to add customized toolbars to the middle area of the taskbar. Right-click an empty spot on the taskbar and choose “Toolbars”. There are five standard default choices , including “Quick Launch” (first figure below). (Other software may sometimes add extra choices.) There is also an item “New toolbar” that allows the choice of any folder (second figure below). The Desktop toolbar gives access to the contents of the desktop without having to minimize any open windows. Similarly, a frequently used folder can be made easily accessible by creating a toolbar for it. [Source: Vlaurie]
Control Panel Items
As the name suggests, Control Panel is where many important system settings can be changed or adjusted. Since so many vital functions can be found there, it is worth looking at some aspects of how it works. The standard way to open Control Panel is through Start-Control Panel. There are two methods of displaying the contents. One is called the “Category View” and displays tasks by generalized categories. Choosing a category leads to another box with a further choice of tasks or icons for specific control panel applets. A second way of displaying Control Panel is called the “Classical View” and displays icons for individual applets. Some of these applets may have several tabs that open different functions. The Applets are components of the Microsoft Windows control panel, which allows users to define a range of settings for their computer, monitor the status of devices such as printers and modems, and set up new hardware, programs and network connections. Each applet is stored individually as a separate file (usually a .cpl file), folder or DLL.
Accessibility Options
The Accessibility Options applet is used to configure StickyKeys, SoundSentry, display, mouse and other accessibility settings. Accessibility Options was replaced by Ease of Access Center beginning in Windows Vista. 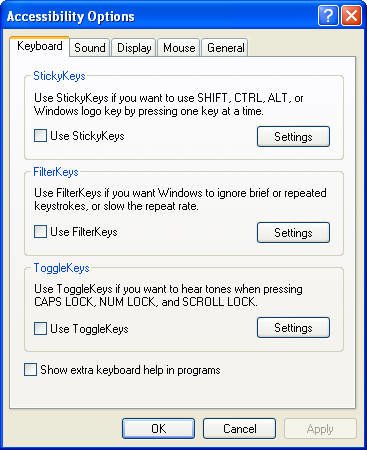
Add Hardware
The Add Hardware Control Panel applet starts the Add Hardware Wizard which is used to manually install devices which are not automatically recognized by Windows. Add Hardware was replaced by Devices and Printers beginning in Windows 7. 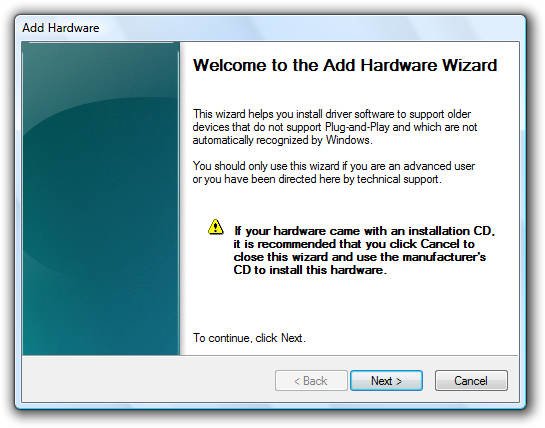
Add or Remove Programs
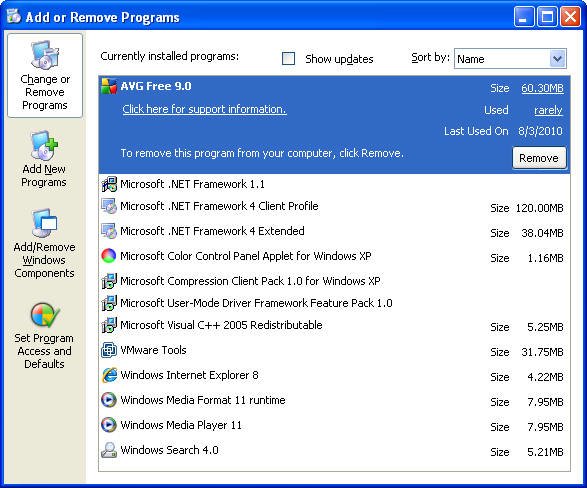
The Add or Remove Programs applet is used to uninstall or change an installed program, view installed Windows Updates, or turn optional Windows features on or off, and to set default program accesses. Add or Remove Programs was replaced by, and split between, Programs and Features and Default Programs beginning in Windows Vista.
Administrative Tools
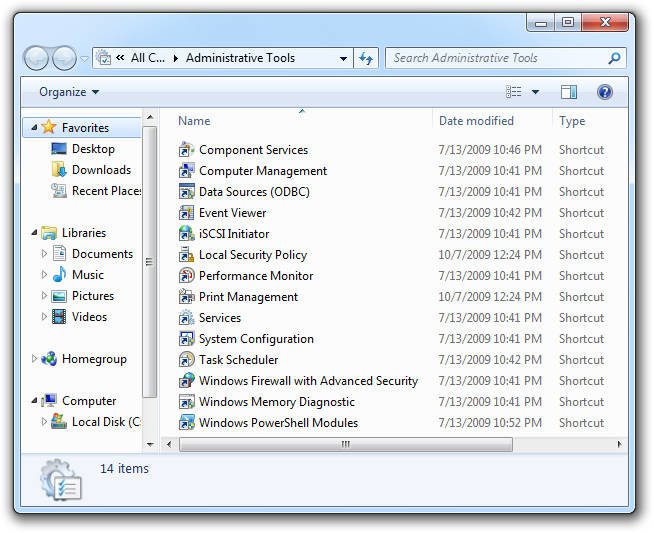
The Administrative Tools Control Panel applet is basically a shortcut to a folder full of shortcuts to additional tools useful for system administrators and users needing to troubleshoot certain kinds of Windows problems.
Date and Time
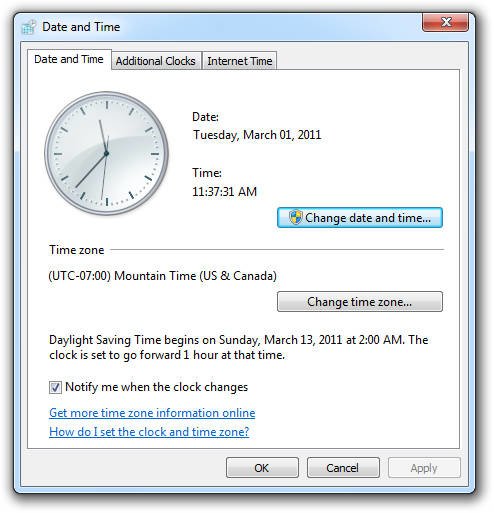
The Date and Time Control Panel applet is used to configure the system time and data, set the time zone, configure daylight saving time, and manage Internet time synchronization.
Device Manager
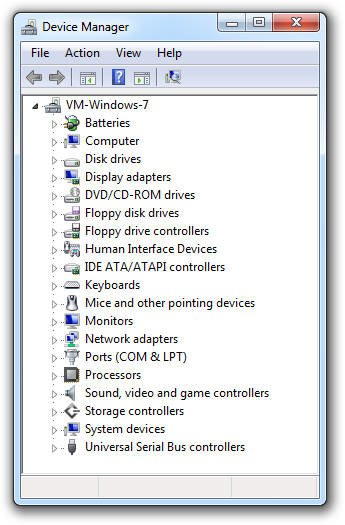
The Device Manager Control Panel applet is used to manage the hardware installed in Windows. Device Manager is actually part of the Microsoft Management Console so the Device Manager applet in Control Panel is more like a shortcut than an integrated part of Control Panel like most other applets.
Display
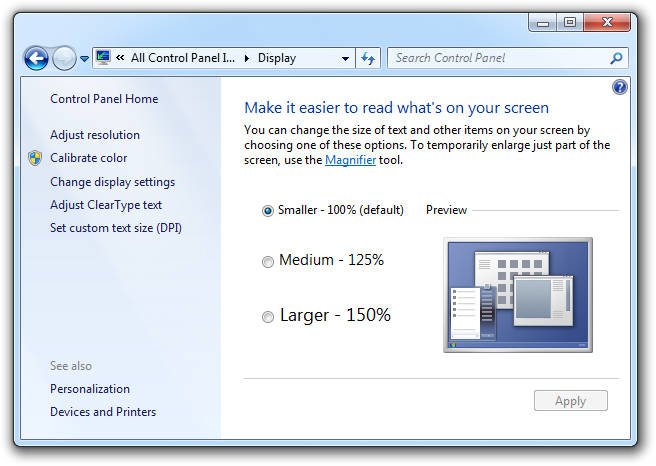
The Display Control Panel applet is used to adjust display settings like screen resolution, multiple monitor arrangement, and text size. Some settings available in the Windows XP version of Display became the bulk of Personalization starting in Windows Vista.
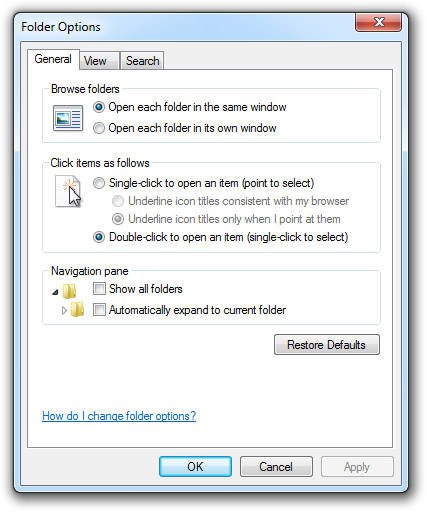
Folder Options
The Folder Options Control Panel applet is used to make all sorts of simple and advanced changes to how folders look and act. One of the most common uses for Folder Options is to configure Windows to either show or hide hidden files.
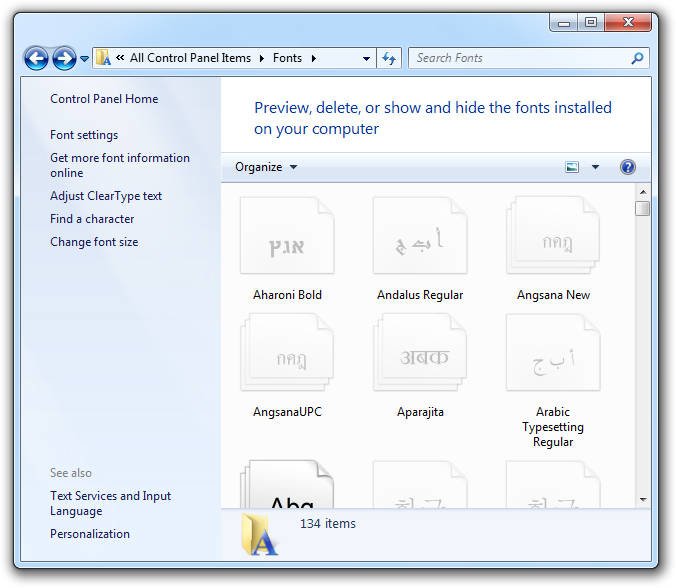
Fonts
The Fonts Control Panel applet is used to add, remove, and configure the fonts available to Windows and the other programs on your computer.
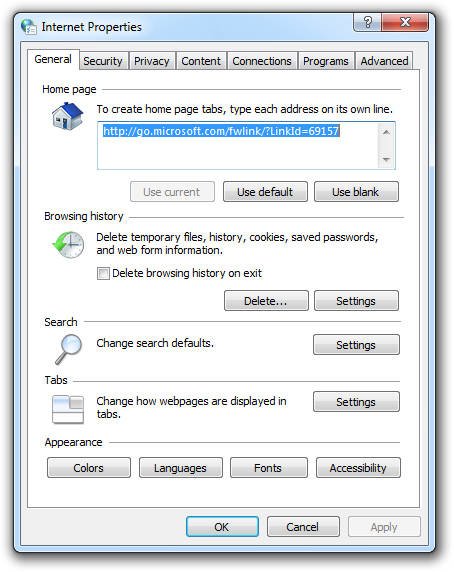
Internet Options
The Internet Options Control Panel applet opens the Internet Properties window for the current version of Internet Explorer installed on your computer. The changes made via the Internet Options applet apply only to Internet Explorer and not to any other browser you might have installed.
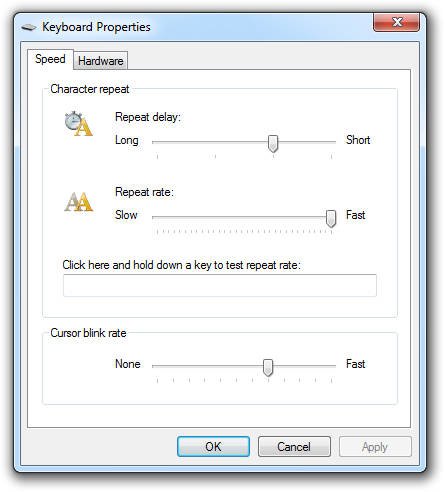
Keyboard
The Keyboard Control Panel applet is used to make keyboard changes character repeat rate/delay and cursor blink rate.
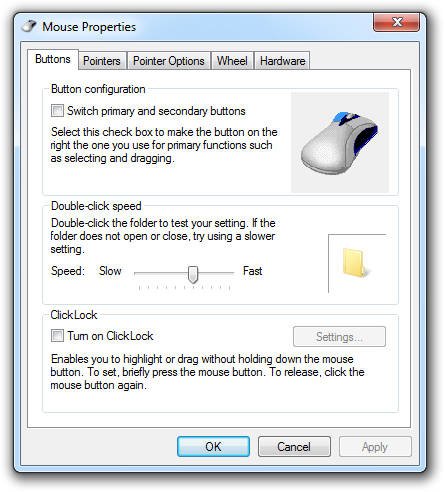
Mouse
The Mouse Control Panel applet is used to make mouse changes like double-click speed, pointer speed and visibility, button and wheel configuration, and more.
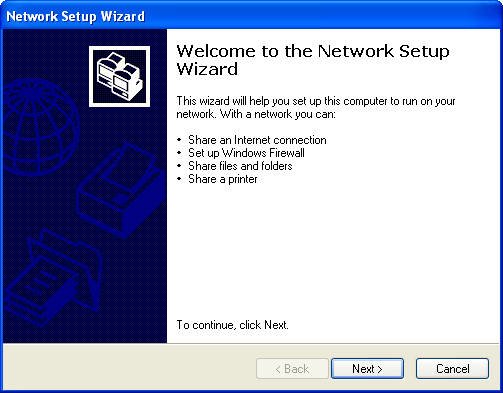
Network Setup Wizard
The Network Setup Wizard Control Panel applet starts the Network Setup Wizard which steps you through the process of setting up an Internet connection, sharing files and printers, etc.
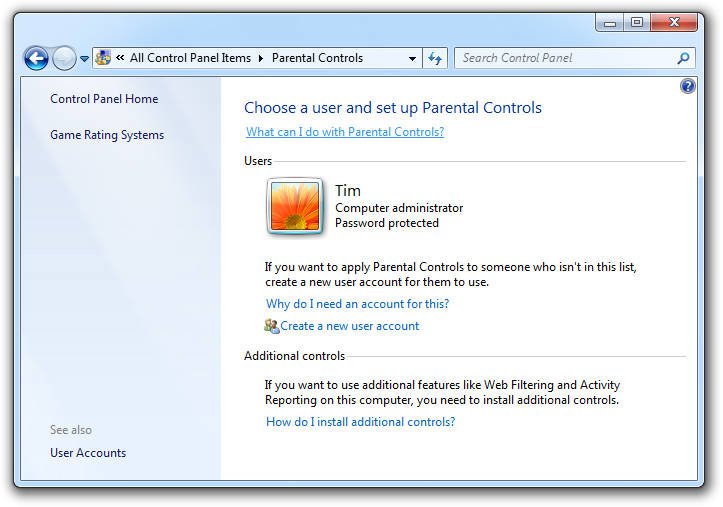
Parental Controls
The Parental Controls Control Panel applet is used to set basic parental controls on a user account, presumably the account of a minor that uses your computer. Parental Controls lets you restrict access to certain programs, set time limits, and more.
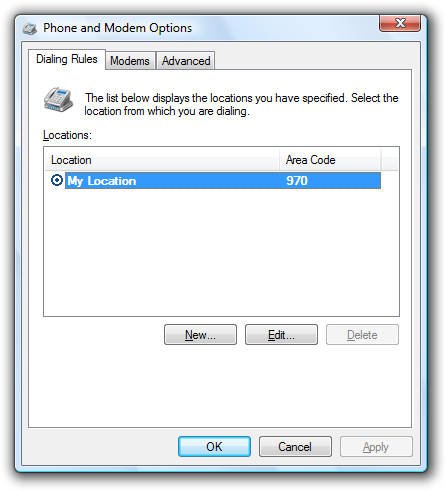
Phone and Modem Options
The Phone and Modem Options Control Panel applet is used to setup and configure modems. Phone and Modem replaced Phone and Modem Options beginning in Windows 7.
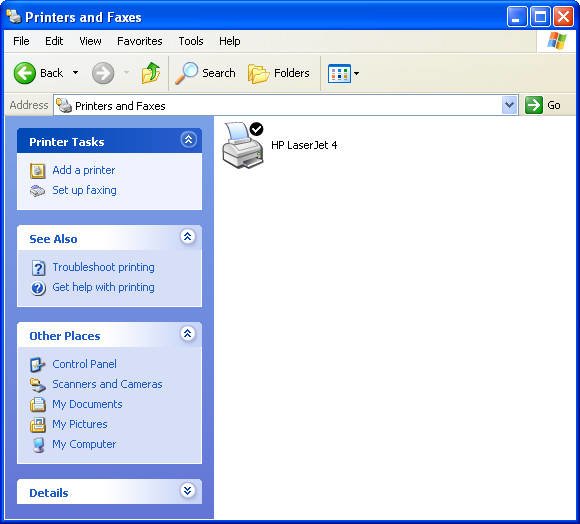
Printers and Faxes
The Printers and Faxes Control Panel applet is used to add, remove, and manage printers and fax devices.
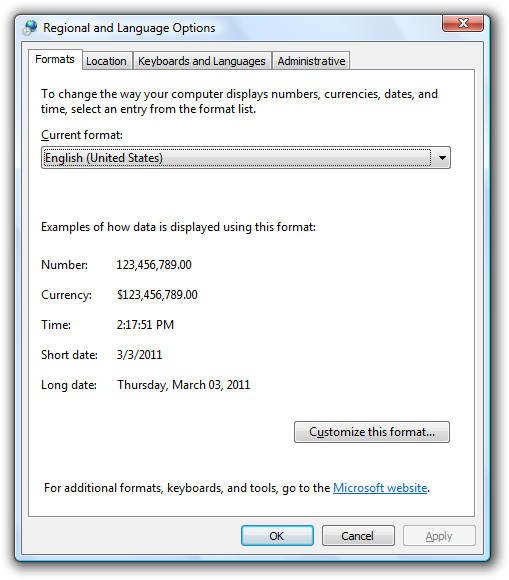
Regional and Language Options
The Regional and Language Options Control Panel applet is used to configure options specific to particular languages or areas of the world like time, date, currency, and number format. Regional and Language Options was replaced by Region and Language beginning in Windows 7.
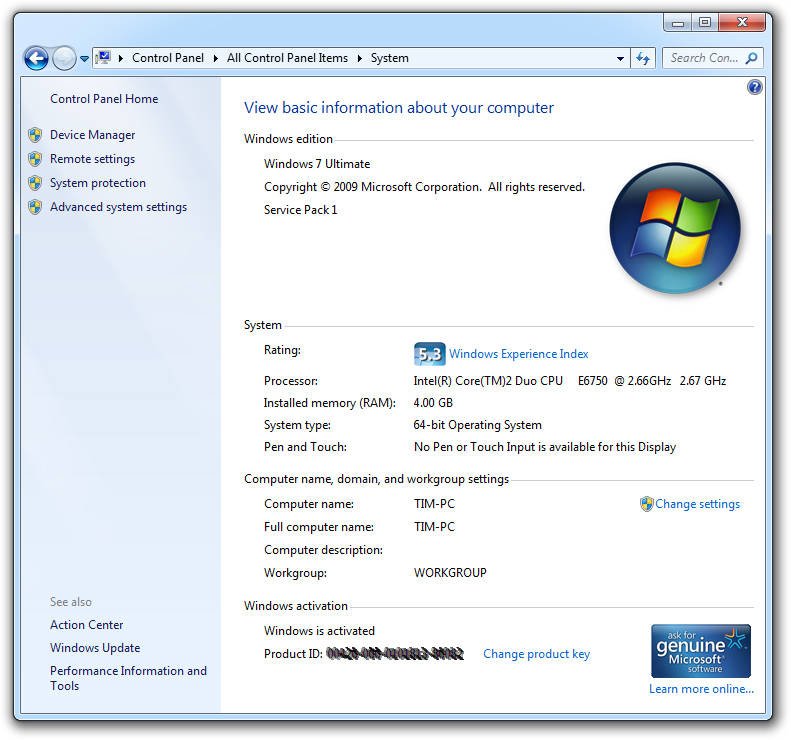
System
The System Control Panel applet is used to view basic information about your computer like the operating system version, current service pack, basic hardware statistics like CPU speed and amount of RAM, and more.
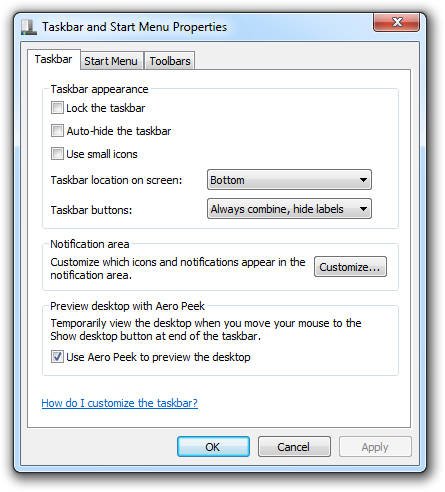
Taskbar and Start Menu
The Taskbar and Start Menu Control Panel applet is used to mange the various options available for the taskbar and Start menu. With Taskbar and Start Menu you can choose to auto-hide the task bar, change Aero Peek settings, set the default power button action, and much more.
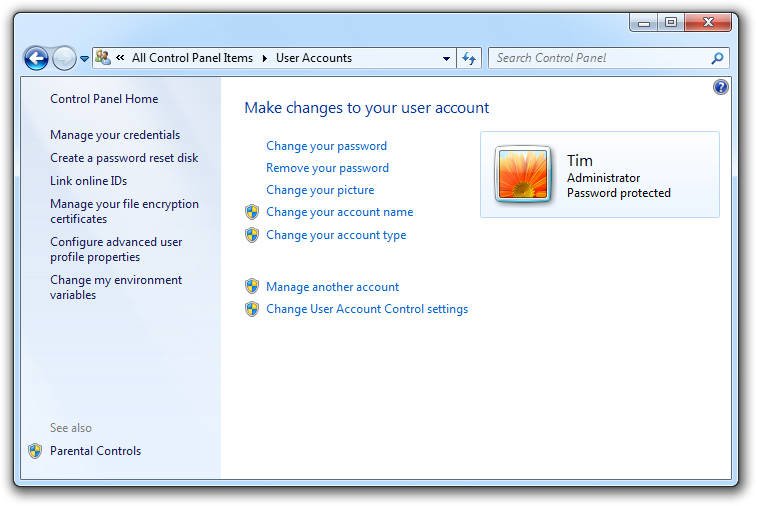
User Accounts
The User Accounts Control Panel applet is used to manage user accounts in Windows. With User Accounts, you can change and remove Windows passwords, change account names and pictures, and more.
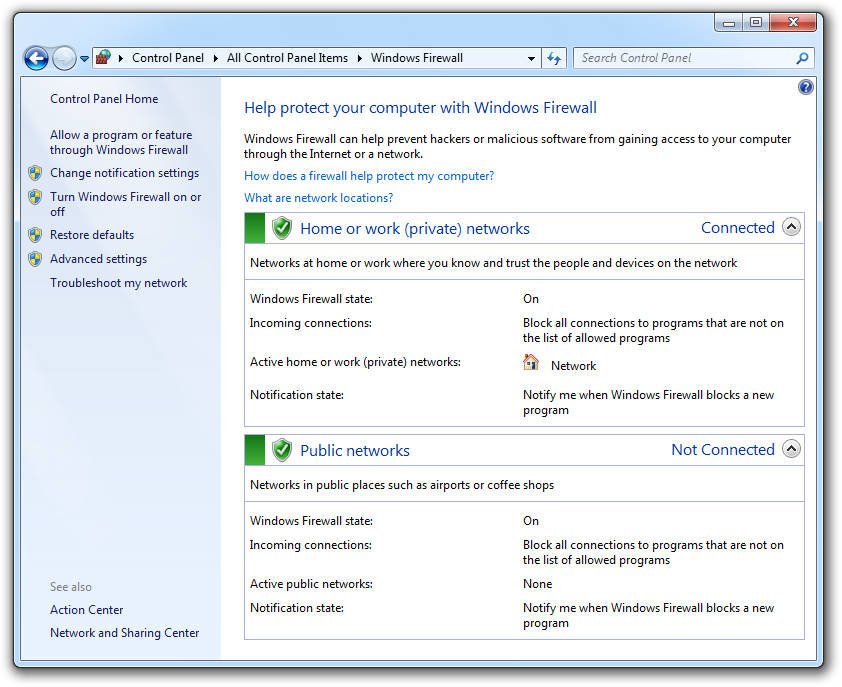
Windows Firewall
The Windows Firewall Control Panel applet is used to manage Windows Firewall including turning the firewall on or off, configuring firewall rules, etc.
[Source: About.com]
Creating shortcut (icons) on desktop
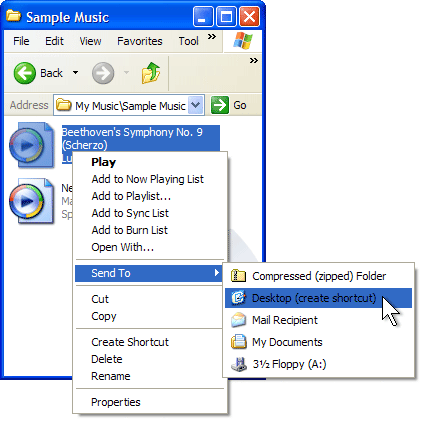 Creating a shortcut on your desktop gives you quick access to your most used program and files. Shortcuts act as links to files and software stored elsewhere on your hard drive. You can create shortcuts for nearly any file, folder or program on your computer and place the links anywhere. Use the Windows desktop to store shortcuts to your most used programs, folders and files.
Step 1
Click the Windows “Start” button and then “Computer.”
Step 2
Locate the file or program you want to create a shortcut for on your hard drive.
Step 3
Right-click the file or program icon, and click “Send To.” Click “Desktop (Create Shortcut).”
Step 4
Minimize any open windows to view your desktop. You will see the shortcut on the desktop with your other icons. Shortcuts have an arrow in the corner of the icon to distinguish them from other files.
[Source: Salon]
Ahmed Abdalla says
Good